Toilet Flange
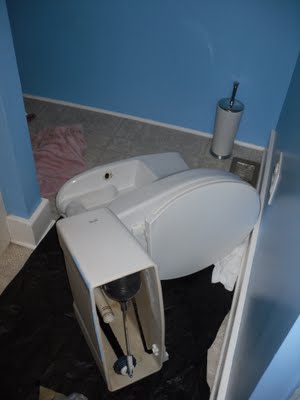
Our toilet rocks.
Literally, it rocks, which means it now leaks.
Well, it did till I took it apart.
 A little wobble overtime will cause the wax seal to fail and the toilet to leak. That's why it leaks. The next question is why does it wobble or why does ours wobble?
Could it be that the flange is somehow installed incorrectly? Could it be that somehow the closet flange bolts aren't in their normal slots (which are broken, the slots, not the bolts), but have been drilled through the flange which causes irregularities in the flange surface (the bolt slots are recessed for the bolt heads. The manually drilled holes for the bolts are not recessed), thus causing the toilet to rock?
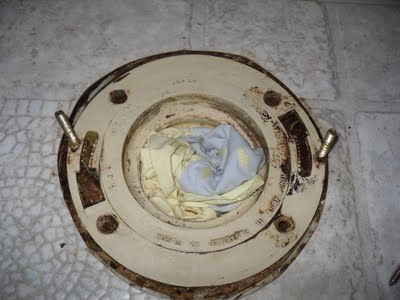
 Though you can't see where the flange rises above the height of the floor at the bolts, you can see where the bolts have been manually drilled and pushed through the flange. How this was done, I have no idea. The flange doesn't just pop off the pipe and pop back on.
The correct fix for this is to cut the pipe, remove the flange, and put a whole new assembly back in its place. The problem is I have two layers of vinyl flooring in this bathroom I'd like to replace with tile, which could change the level of the floor. If I replace the flange now, which has to be flush with the floor, it could be off once the tile floor goes in. Better to wait for the heavy work until the floor is right.
For now, I'll return the "extra thick" wax replacement ring I bought (which has longer screws that I can't replace because of how the above screws were installed), get a regular ring, then use caulk around the base of the toilet to stop the wobble. Of course if it ever leaks again I'll never know as the caulk will keep the water under the toilet and rotting through the floor. One day I'll go to sit down and fall right through to the basement as the weight of me and the toilet crashes through the rotted floor.
Joy.
Is it too late to rent?
- b
Literally, it rocks, which means it now leaks.
Well, it did till I took it apart.
Could it be that the flange is somehow installed incorrectly? Could it be that somehow the closet flange bolts aren't in their normal slots (which are broken, the slots, not the bolts), but have been drilled through the flange which causes irregularities in the flange surface (the bolt slots are recessed for the bolt heads. The manually drilled holes for the bolts are not recessed), thus causing the toilet to rock?
The correct fix for this is to cut the pipe, remove the flange, and put a whole new assembly back in its place. The problem is I have two layers of vinyl flooring in this bathroom I'd like to replace with tile, which could change the level of the floor. If I replace the flange now, which has to be flush with the floor, it could be off once the tile floor goes in. Better to wait for the heavy work until the floor is right.
For now, I'll return the "extra thick" wax replacement ring I bought (which has longer screws that I can't replace because of how the above screws were installed), get a regular ring, then use caulk around the base of the toilet to stop the wobble. Of course if it ever leaks again I'll never know as the caulk will keep the water under the toilet and rotting through the floor. One day I'll go to sit down and fall right through to the basement as the weight of me and the toilet crashes through the rotted floor.
Joy.
Is it too late to rent?
- b
Labels: caulk, home maintenance